
Lesson 2 for the Budding Young Seamstress
I am presenting some incremental sewing lessons geared toward youngsters who would like to learn to sew. I hope to build an enthusiasm for sewing by offering projects that are of interest to the younger set, are simple in their construction, and can be quickly completed. It is my aim to introduce the most simple of skills and gradually add more and more difficult skills and techniques as the lessons go along. In our first lesson we learned to cut out a pattern, sew a straight seam, make a casing for elastic, and machine stitch a straignt hem. In today's lesson, we will be building on our first lesson and adding 2 new skills -- zigzagging to finish a seam and sewing a curved seam.
While this tutorial is aimed at the young person beginning to sew under the supervision of her mother or an instructor, it can also serve as a starting place for the older person wishing to teach themselves the basics of sewing. Those who are older when they learn to sew often become discouraged by the appearance of their project, and they often quit trying to learn to sew, saying that they will never be ABLE to learn to sew WELL. I believe that this discouragement stems from trying to sew too complicated or difficult of a project before they have learned the basics.
NOTE TO THE MOM TEACHING HER YOUNGSTER TO SEW
I suggest that you read the ENTIRE tutorial BEFORE starting your project. I will stress throughout these lessons the importance of certain steps. When I do so, please stress them to your young student as well. These are steps that beginning sewists generally think are optional or unimportant; however, they are the steps that make a finished product look polished and well-made. If your student learns to incorporate these skills into her early projects, they will be skills that will stay with her and aid her in becoming an accomplished seamstress. You should teach the lessons in their numerical order. If your student has not done Lesson 1, I strongly suggest that they do so before beginning this lesson.

SUPPLIES YOU WILL NEED FOR THIS PROJECT
tissue paper or a piece of paper or newsprint to use to make a pattern
light weight cotton fabric
11" piece of 1/2" elastic
light weight cotton fabric
11" piece of 1/2" elastic
a piece of 1" wide eyelet lace at least 36" long
scissors or rotary cutter
bodkin or safety pin
thread to match fabric
ruler
iron
sewing machine
sewing pins
scissors or rotary cutter
bodkin or safety pin
thread to match fabric
ruler
iron
sewing machine
sewing pins
PREPARATION OF PATTERN
Mom, before you start, you will need to prepare the pattern OR walk your daughter through the process. Begin by cutting a 13-1/2" x 1-3/4" rectangle and a 4" x 6-1/2" from a piece of tissue paper, paper, or newsprint. Mark a line for placing it on the straight of the material by drawing a line down the center (measure an equal distance from the long side of the paper rectangle). See photo below. Draw arrow heads at the ends of the line, and write the words "straight of the material" along that line. On the 13-1/2" x 1-3/4" rectangle also write the words "cut 1".
By marking the pattern piece in such a manner, you are beginning to acquaint your student with certain terms and markings that she will see later on professional patterns.

On the 4" x 6-1/2" rectangle, measure 1" in from both long sides at the very top of the rectangle and mark with a small pencil line. Now using the ruler draw a line from the 1" inch mark to the corner as indicated by the hand in the photo below. Do the same on the other side, drawing a line from the 1" mark to the corner below (not shown). The left and right sides of the pattern will look the same.

Now cut along the lines you just drew. You will now have a pattern piece that is wedge-shaped and looks similar to the photo below. Now write "cut 8" on the wedge-shaped piece as shown. At this point your pattern pieces are complete, and . . .THERE. . .YOU HAVE NOW MADE A FREE TWIRLY SKIRT PATTERN FOR YOUR AMERICAN GIRL DOLL. Simple, right?
CUTTING OUT THE PATTERN

STEP 1: Fold the fabric in half, aligning the SELVAGE. The SELVAGE is the the narrow, finished border along both lengthwise sides of the fabric as it come off the bolt. (Explain this term to your student, allowing her to examine the fabric for herself.)
STEP 2: Place the wedge-shaped pattern piece on the material. Be certain that it is on the straight of the material, by making sure that it is an equal distance from the selvage of the fabric to the arrowed line. Here you will explain that this is a very important step, because this is what makes our finished garment hang correctly. When a pattern piece is placed in this manner it is said to be "on the straight of the fabric". Being careful, not to move the pattern piece, place a pin in both ends of the arrow. This will anchor your pattern on the straight of the material. Now, pin each side of the pattern piece. You will need to cut 8 wedge-shaped pieces for the skirt body and 1 of the other pattern piece for the waistband.
STEP 3: Cut around all pattern pieces. Explain to your student that it is very importaint to cut nice straight lines (not jagged). Precise cutting makes it easier to match pieces together for sewing.
TIME TO SEW
 STEP 4: Place 2 wedge-shaped pieces together (right sides facing) and pin along the right hand long seam. (The narrow part of the wedge is the top of the skirt -- the wide part is the bottom of the skirt). Sew 1/4" from the edge from top to bottom. (On this project all seams will be stitched with a 1/4" seam allowance. Back stitch at the beginning and end of each seam. This is done by stitching 2 or 3 stitches forward, then reversing and stitching 2or 3 stitches backward. Once again instruct your student in the importance of being precise by encouraging her to try to stitch a nice straight even line. Also explain the term "seam allowance" which is the measure between the stitching line and the edge of the seam.
STEP 5: Continue to add wedge-shaped pieces of fabric to the right-hand side of already assembled pieces. Pin the edge, backstitch, and sew with a 1/4" seam allowance. The picture below STEP 6 shows how it will look as you continue to add pieces. When you have sewn together all 8 pieces, proceed to STEP 6.
STEP 6: SEAM FINISHING This is a very important step which I strongly suggest that you DO NOT SKIP! This step prevents excessive fraying of the fabric when it is placed in the washer. To finish the seam, simply set you machine to zigzag stitch and do a zigzag line of stitch between the seam line and the edge of the fabric as shown in the photo below.

STEP 7: PRESSING SEAMS - I can not possible overemphasize the importance of carefully pressing all seams after they have been sewn and finished. Pressing the seam flat prepares it to be SMOOTHLY sewn to the next part of the garment , etc. In a later lesson we will explain different seam construction methods, but for the ease of our inexperienced students and because of our narrow seam allowances of 1/4", we have chosen this method of seam construction and pressing for this project. Place the body of the skirt with the right side of skirt facing down on the ironing board. As shown in the photo below press each seam (one at a time) toward the right.

STEP 8: Fold wrong sides of the waist band rectangle together and press flat. See photo below.

STEP 9: Place the waistband on top of the skirt body. Carefully pin the waistband to the right side of the skirt material (see the picture below), matching raw edges. (You may possibly have a little extra waistband left over. If you do, don't worry. We will handle that shortly, if needed.)
STEP 10: Sew waistband using 1/4" seam allowance.
 STEP 11: Press waistband upward.
 STEP 12: After the waistbandI has been pressed upward, if your it extends beyond the edge of the skirt body, cut it off even with the skirt.
 STEP:15 Pin the eyelet lace to the right side of the fabric at the bottom of the skirt. If you have been going through these lessons, this will be your student's first attempt at stitching a curved seam. This is a gentle curve, and there should be little difficulty if the machine is run slowly. Look directly at where the needle is, that will help you keep the proper seam allowance. Practice will bring improvement, so don't allow your student to become discouraged if her stitching is not as smoothly curved as she would like.
 STEP 11: Press waistband upward.
  STEP 12: After the waistbandI has been pressed upward, if your it extends beyond the edge of the skirt body, cut it off even with the skirt.
STEP 13: Attach a bodkin or safety pin to one end of the elastic and thread the elastic through the waistband casing.  STEP 14: Stitch and backstitch each end of the waistband casing 1/4" from the edge to anchor the elastic. Be certain that you are stitching through BOTH the elastic and the fabric.
STEP 14: Stitch and backstitch each end of the waistband casing 1/4" from the edge to anchor the elastic. Be certain that you are stitching through BOTH the elastic and the fabric.STEP:15 Pin the eyelet lace to the right side of the fabric at the bottom of the skirt. If you have been going through these lessons, this will be your student's first attempt at stitching a curved seam. This is a gentle curve, and there should be little difficulty if the machine is run slowly. Look directly at where the needle is, that will help you keep the proper seam allowance. Practice will bring improvement, so don't allow your student to become discouraged if her stitching is not as smoothly curved as she would like.STEP 16: YOU'RE ALMOST FINISHED!!! Press the lace away from the skirt body in the same manner you pressed the waistband in STEP 11.
STEP 17: Fold the skirt in half, carefully aligning the raw edges and pin.
STEP 18: Cut away the extra lace, to be even with the edge of the skirt. Aligning a ruler with the raw edge of the material, will show you the correct angle of the cut to be made. (See photo below.)
STEP 19: Use a 1/4" seam allowance to sew the seam that you pinned in STEP 17. Finish this seam as in STEP 6 and press as in STEP 7.

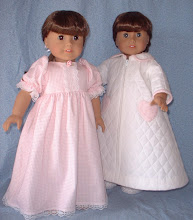
BELOW SAMANTHA MODELS THE FINISHED PROJECT!

If you would like to make a matching twirly skirt, for your little girl, visit Renaissance Pillowcase Skirt Tutorial for the HOW TO. Seeing the beautiful little twirly skirts Rebecca made her Little Miss inspired me to develop this pattern for 18" doll.
Y Blessings,
Nanci


1 comment:
That's fabulous! How EVER did you find those finger pointer things? Those are great! Thanks for the tutorial. I'll try and link up to it one of these days!
Post a Comment